On breadboard we had the ATMega (168 or 328) and the Max232 (for serial communications) ICs, with required resistors and capacitors, plus a bunch of wires to ease the input/output access.
That indeed was the final project, but the visual impact brings us to deny.

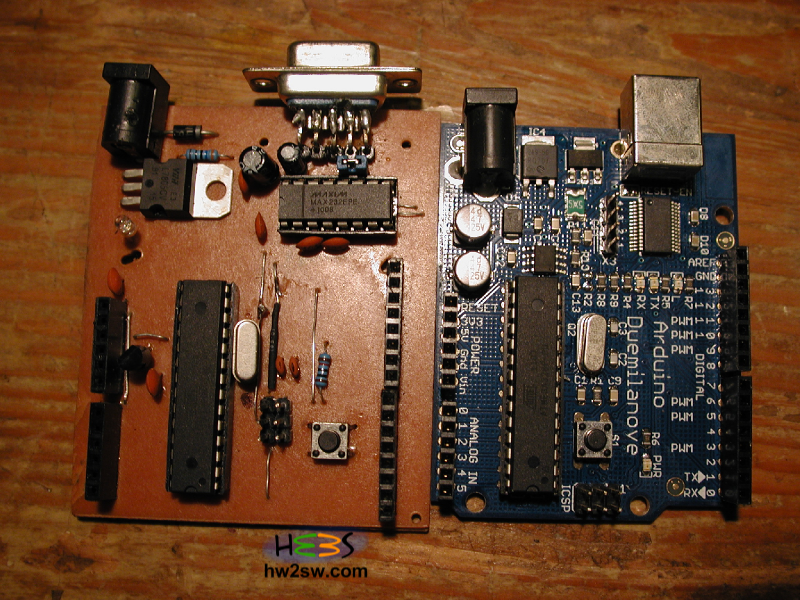
Take a look at the photos, and try to resolve in mind which matches what between them.
They are the same project... oh well, with the obvious differences.
And here you just have one proof of about what written above: we made a board compatible with any other Arduino (we preferably refer to Duemilanove) and one mandatory requirement was the positioning of all headers.
To be precise, the absolute sizes of the board are not a strong limit, but the relative distances between headers surely are: the right sides gives the other expanding boards the possibility to fit onto our clone.

When designing a board, the CAD softwares help you in the step from schematics to board's drawing.
An electrical scheme is indeed not so different from what we have on breadboard: a bunch of modules with interconnections.
In the scheme (reported in previous page) every module is clearly separated; with the practice this skill will be acquired to put modules into a better visual order: so important when they grow in number and size.
In the next article we'll talk of the idea of project, with every major aspect which guided us to realize the final board.
Yes, it has a name just like any Arduino's clone. This is called Serialino.
More in next posts.
Thank you!