 This tutorial explains how to use an arduino duemillanove board as an AVR ISP in order to burn your bootloader into your brand new ATmega168 or ATmega328 chip.
New ATmega chips does not have the arduino bootloader so you have to program them with an external programmer.
If you have an arduino uno you have to use the usbtiny bootloader method and not this one.
Arduino IDE has a demo program called ArduinoISP located at File->Examples->ArduinoISP.
ArduinoISP makes your arduino board an ISP (In System Programmer) capable to program other ATMEGA chips.
So arduino board will function as source (server) and a breadboard is needed as destination (client).
Step 1
The first thing to do is to set up our breadboard. The breadboard should host our new chip in order to be bootloaded.
Here comes again the problem with the so called minimal arduino board seen at the article "from an arduino project to a standalone one" .
We have to construct the minimal circuit on the breadboard but since we take the voltage source directly from our arduino board we can ignore the voltage regulator.
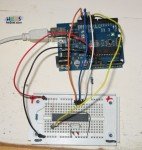
So we have a circuit like the photo below.
Notice that the 120Ohm resistor is added between Reset pin and 5V in order to disable the auto reset function of arduino.
We use an already bootloaded ATmega 168 chip as source into the arduino board and we want to burn a brand new ATmega 328 located on our minimal configuration breadboard.
The fritzing schematics can be found gere : ArduinoISP fritzing
Step 2
Connect the arduino board at your computer via usb.
We launch Arduino IDE and we select File->Examples->ArduinoISP.
Now in our case we select Tools->Board->Arduino diecimila, duemillanove or Nano w/ATMEGA168 since we have the ATMEGA168 in our arduino board. We select the correct serial port from Tools->Serial port.
Now we press the upload button.
Doing this procedure we uploaded at our arduino board chip the ArduinoISP.
Now arduino became an ISP
