Now we know stuff which to work with, and we can begin bootloading.
First of all the driver! and only on Windows platforms.
Neither Linux or Mac need it, so that following description focuses on Win.
Download the driver: you can find it here (win xp) or here (win vista and 7). Unzip the file to get a new folder.
Now you can choose between manual and automatic installation:
- manual: open unzipped folder, right-click on the setup information file ("usbtinyisp.inf" for xp, "USBtiny" for others);
- automatic (xp): connect USBtinyISP board to pc via usb; system will notify you about new hardware found, opening a wizard window which to choose software installation from. Select "No, not this time" and click "Next".
Select "Search for the driver" and click "Include this location", then browse to the unzipped folder: click "OK".Click "Finish". You're done!
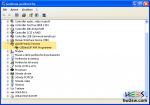
Check if all's gone well by opening Device Manager (Start Menu -> Settings -> Control Panel -> System -> Hardware) and look for the device: if present that's ok. Here below pictures show what described.
After this set the correct connection on as previously illustrated (remember the power jumpers on USBtinyISP).
Now open Arduino's IDE; from menu choose:
- Tools -> Board -> Duemilanove (second or third item);
- Tools -> Burn Bootloader -> w/ USBtinyISP (third item).
Bootloader starts, requiring nearly a minute to complete operations: LED marked "BUSY" will be on all this time.
After that all is done! Watch the video to see how simple it is.
Good job! See you on next article!


