After a successful upload, you see that Serialino does the job.
Below the Blinking LED test.
Maybe nothing special, but this pushes us to test it under a little more complex situation.
And here the ethernet board we talked on the top of post.
This is one of very first Arduino compatible board, with the following chip:ENC28J60 from Motorola MicroChip.
The board is called "Arduino Ethernet Shield V1.1"
You have to get the right library: from the original site or form here.
The only way we had to make it run has to use an old IDE version, numbered 0.23, the last before the 1.0 version.
This due to the incompatibility of the example code with the new IDE.
We had to make a modification as well to a library of the old environment to avoid an reference error.
Look for the wiring.h file in the path arduino-0023/hardware/arduino/cores/arduino/, find and comment the following code row: define round(x) ((x)>=0?(long)((x)+0.5):(long)((x)-0.5))
This is not the optimized solution, but we just want to quickly try the communications between Serialino and the shield.


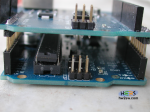
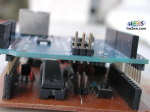
With the IDE correctly set we can now put the ethernet board onto Serialino: and here the issue we talked about the female headers relative distance.
While the insertion on Arduino Duemilanove is immediate, our Serialino board presents a so little distance more, but enough to force us to pay attention when inserting.
The two pictures beside show in detail this aspect.
So please, take care of it unless you have already modified this little imperfection from the KiCAD pcb file.
The example code is simple: after the MAC and IP address setting, and with the code successfully loaded in Serialino, the ethernet board is now a basic web server, which returns an HTML static page.
[this example is included in the zip file of the ethernet library]
In the video below we upload and test the web server example.
We hope this can encourage you to replicate and play with this new Arduino clone: it's simply to make, very cheap, and design files are available to all.
Thank you!