In this article we will present one possible method to put a bootloader into a virgin Arduino's ATMega 328P.
We'll utilize :
- Arduino 2009 board with power supply (via USB from PC or external);
- A virgin ATMega 328P micro controller;
- 4 wires.


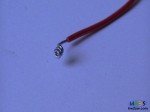
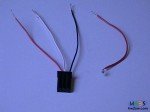
Now prepare the wires; in pictures above you can see 3 of them ready to be connected.
The wires are homemade but you can use female to male wires like the third picture.
In the case of the homemade ones , the top coil must be very tight in order to hook the male pin which is going to fit.
We're ready to make necessary connections in order to put the bootloader (Burning) into ATMega micro controller.
Pay attention: the technique we're describing is called "BitBang", a special one that uses serial communication, transforming the Input/Output lines into buses able to receive/send (almost) at same time.


In particular BitBang is referred to FTDI devices, which is present only on very few Arduino boards, so it's not an universal solution like the one with an external programmer.
If you don't have an external programmer, but a arduino 2009 board instead, you can operate as follows :
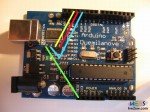
Connect the four wires like in picture above.
The male pins in the picture above are called X3 Pins.
These X3 Pins are strictly related to the FTDI so without this the method can not be applied.
Pingback: USBtinyISP v2.0 para cargar firmware de Arduino en Stock!! » SAWERS TECHNOLOGY