Skip to content

Making DMM
Making DMM

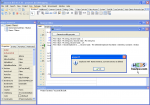
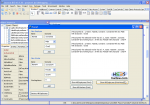
In this third and last article of this series we will add two libraries in our Lazarus project and the event handling.
The compiled project can be found at TrustFm website.
We are going to use the synaser library (part of synapse) for the serial communication and the PlotPanel in order to plot our real time graph.
For synaser we are going to add only the "synaser.pas" file into our project.

For the PlotPanel we need to add the "plotpanel.pas" file into our project.

More informations for synaser can be found here and for PlotPanel here

...continue reading "Designing the software data logger for MASTECH MS8229 part2"
hole hack 3
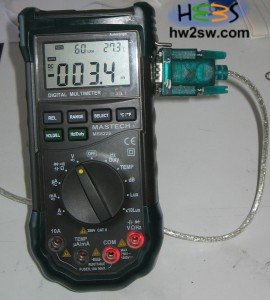
MASTECH MS8229

We have seen in this article how to hack fiscally our multimeter.
Now we have to start building our software in order to parse the 14 byte hexadecimal string into something more human.
The knowledge of bitwise operations is highly recommended and specially the masking technique (bitwise AND).
It is now time to start !
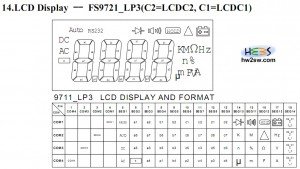
From the FS9721-LP3 documentation we clearly see that we get as response from the device a 14 byte code.
Each byte of this code has this structure NNNNXXXX where NNNN is the number of the segment of the table.
The reported table below has 14 segments (seg1-14).

The XXXX part reveals which bits of the NNNN segment are active (1 = true) or not (0= false).
We immediately understand that a correct code should be 1X 2X 3X 4X 5X 6X 7X 8X 9X AX BX CX DX EX since all the segment columns of the table should be filled.

Mastech MS8229 LCD Decoding table

Time for an example. If the first byte of the 14-byte code is 17 (in hex) means that we are talking about the segment 1 (which is correct) and the settings for this first segment are 7 (in hex) or 0111 in binary.
From the table we discover that RS232,AUTO and DC should be on and AC off.

...continue reading "Designing the software data logger for MASTECH MS8229"

Generics-GUI
Generics - GUI

When you face the matter of writing duplicated code, an idea generally rises about how to not waste time.

In strongly typed coding languages a simple mechanism exists, aiding the coder to solve the problem.
The so called Template.

They are designed so that classes and functions able to work with generic types, giving them the possibility to operate on different data types without the need of rewriting code for each of them.

Maybe you've just thought about the concept key: the abstraction.
Indeed we're dealing with it in the sense described above: a template is a try to avoid useless repeating code writing, and to do this we're forced to find a more general way than the direct and boring one.

...continue reading "Generics and templates"

Interfaces2-GUI
Interfaces2 - GUI

By reading the introduction of the interfaces, you obtained a mechanism that makes a class really and completely abstract.

From the article we highlighted their total abstraction.
We noticed that it's contained methods must be overridden by the inherited class(es).
Furthermore a interface does not have any attributes.

Finally we wrote - just on the rush - that the Interfaces mechanism overpasses one compiler's weak point, about the inability to support the multiple inheritance.

In brief: the multiple inheritance in FreePascal grants that an inheriting class can inherits from more than one more abstract class.
It so expands its possibility to enrich itself, always  by keeping the order and the hierarchy achieved with the interfaces.

And that's very good... in theory.

...continue reading "Interfaces and multiple inheritance"

Circular Menus Redux

Seems like the old circular menu class is now incompatible with the new Arduino 1.0 GUI version.
Rober Wagner from the arduino forum described the incompatibility. He also sent to us an email and we thank him for the contribution.
The circular menu seems to interest a lot of people so we decided to "port" the circular menu class into the new Arduino 1.0 GUI.
We will try to describe the class in the future.
Now before starting have a look at the documentation of the "old circular menu".
As always you have to construct the three button configuration on your breadboard.
The down button is on digital port 7 the right button on digital port 6 and the enter button at digital port 5.
In order to find out how to connect buttons on your arduino please read the "arduino and memory how to" tutorial.

...continue reading "Circular menu in arduino redux"