Skip to content

Serialino-PCB
Serialino - PCB

We talk again of Serialino, our Arduino's clone: this time the printed circuit board (PCB) design is shown.
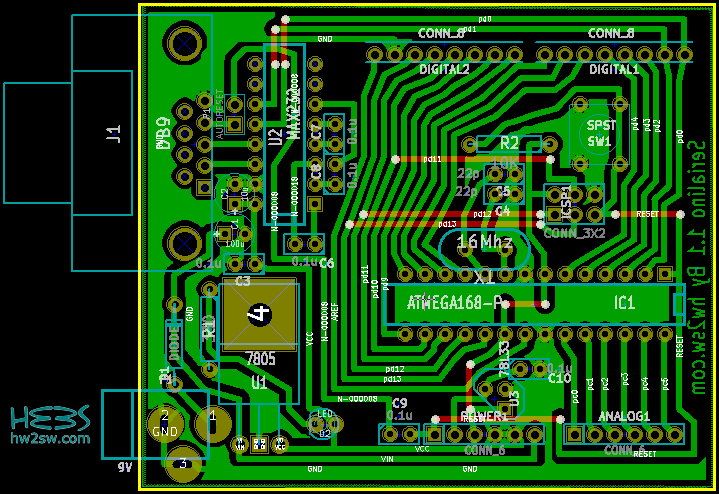
Here beside you find a screen-shot of the PCB of Serialino, numbered 1.0.

Even from here you should be able to distinguish the areas described in the previous post.

Power supply section on the bottom-left; the communication port and IC Max232 on the top-left; the headers on top and bottom; and finally ATMega with external oscillator, then the switch button and the ICSP pin headers.

...continue reading "Serialino – The PCB"

Liquid Filler 3D

We have already seen till now how we have constructed our project in PCB .
Liquid filler at this point needs calibration.
In this article we will discuss the calibration method.
The first step is to dimension correctly the RG resistor.
From the weight sensors article we already know that :
a) For a 1Kg load cell we are going to need Gain=1,07421875/0,005473=196 for a 1.1V arduino reference analogReference(INTERNAL); So we need a Rg=312 Ohm.

b) For a 20Kg load cell we need a Gain =  3925 for a 1.1V arduino reference analogReference(INTERNAL);
So we need a Rg=15 Ohm.

...continue reading "Liquid Filling Machine – Liquid Filler Part 4"

1

Liquid Filler On Breadboard Part2

In the first part of liquid filler we have made the user interface.
LCD buttons and circular menu were made.
Now it is time to add the relay and the weight sensor.
We will keep working on our breadboard.
In this article we will see how to connect the relay then our load cell amplified by the INA125 and lastly the modified code from the last time.

It is highly recommended to read the relay article and the weight sensors introduction before you start.

...continue reading "Liquid Filling Machine – Liquid Filler Part 2"